
- Training
- Service
- Promotion
- Schedule
- Testing Center
- News
- Contact
4/27/2022


Business process flows are used to guide a user through the steps of your business process when working with Model-driven apps and Microsoft Dataverse. The example below will guide you through the process and decisions you need to make when building a business process flow.
Create a business process flow
1. Launch Power Automate and sign in using your organizational account.
2. In the left pane, select My flows.
3. On the top bar, select Business process flows.
4. Select + New at the top.
5. In the Build a business process flow pane, fill in the required fields:
The table that you select affects the columns that are available for steps in the business process flow. You can't change the table after creating the business process flow.
6. Select Create.
The new process is created, and the business process flow designer is started. The designer page has three sections:
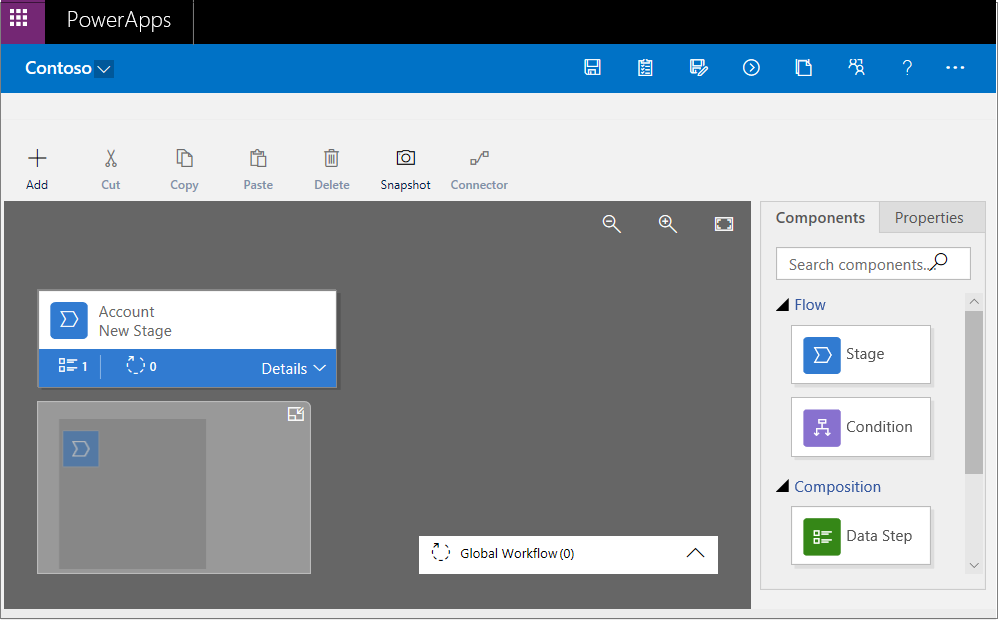
7. Add stages, so that users can proceed from one business stage to another in the process:
a. Drag the Stage component from the Components tab to the plus sign (+) in the designer.
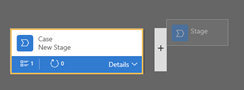
b. Select the stage, and then, on the Properties tab on the right, set the properties:
i. Enter a display name.
ii. Optional: Select a category for the stage (for example, Identify or Research). This category will display on the business process flow stage.

iii. When you've finished setting the properties, select Apply.
8. Add steps to each stage:
a. Select Details on a stage to view the steps and processes in that stage.
b. Select Data Step #1 to edit the Properties of that step.
c. Populate Identify Primary Contact for the Step Name and select Primary Contact for the Data Field.
d. Select the Component tab and drag the Data Step component to the stage, under the previous step.
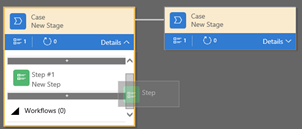
e. Repeat the previous steps to populate the Data Steps as desired.
9. Add a branch (condition) to the process:
a. Drag the Condition component from the Components tab to the plus sign (+) between two stages.

b. Select the condition, and then, on the Properties tab, set the properties. When you've finished, select Apply.
10. Add a workflow to the process:
a. Drag the Workflow component from the Components tab to either a specific stage or the Global Workflow item:
b. Select the condition, and then, on the Properties tab, set the properties:
i. Enter a display name.
ii. Select when the workflow should be triggered.
iii. Search for an existing on-demand active workflow that matches the stage entity, or create a workflow by selecting New.
iv. When you've finished, select Apply.
11. To validate the business process flow, select Validate on the action bar.
12. To save the process as a draft while you continue to work on it, select Save on the action bar.
13. To activate the process and make it available to your team, select Activate on the action bar.
14. To define who has privileges to create, read, update, or delete the business process flow instance, select Edit Security Roles on the action bar. For example, for service-related processes, you might give customer service reps full access to change the business process flow instance. But you might give sales reps just read-only access to the instance, so that they can monitor post-sales activities for their customers.
a. In the Security Roles pane, select the name of a role to open the details page for that role.
b. On the Business Process Flows tab, select options to assign the role appropriate privileges for the business process flow.

c. Select Save.
Edit a business process flow
You can edit the business process flow after it has been created.
1. In the Power Apps portal, select Flows in the left pane.
2. In the list of processes, select the business process flow that you created, and then select the Edit button.
Keep the following points in mind when you edit the stages of a business process flow:
Now you have seen firsthand the process and options for creating a business process flow. You can now apply these lessons to your own business process flow and continue to refine your flow by adding conditions, for example. Business process flows offer multiple levels of customizations to help facilitate working with your business data.

12/11/2025


