Create an interactive customer journey with conditions and signup
6/4/2021
In Create a simple customer journey, you created a customer journey that sends an email message to all contacts in a segment. Now we'll go a bit deeper into customer journeys to see how to add interactive features and decision points by including landing pages and conditions in the design.
- Go to Marketing > Marketing Execution > Marketing Emails and create a new email message like the one you made in Create a marketing email and go live. Be sure to include all the minimum requirements—name, subject, from-contact, subscription center link, and sender physical address—but don't go live yet.
- This message will invite recipients to pick up a free download from your website. To get the free download, they'll need to visit the landing page, submit a form, and then wait for a follow-up email that contains the download link. (The message content would normally explain all of this, but for this exercise it's not necessary.) With your new email message still open, drag a Marketing Page design element from the Toolbox onto the design canvas.
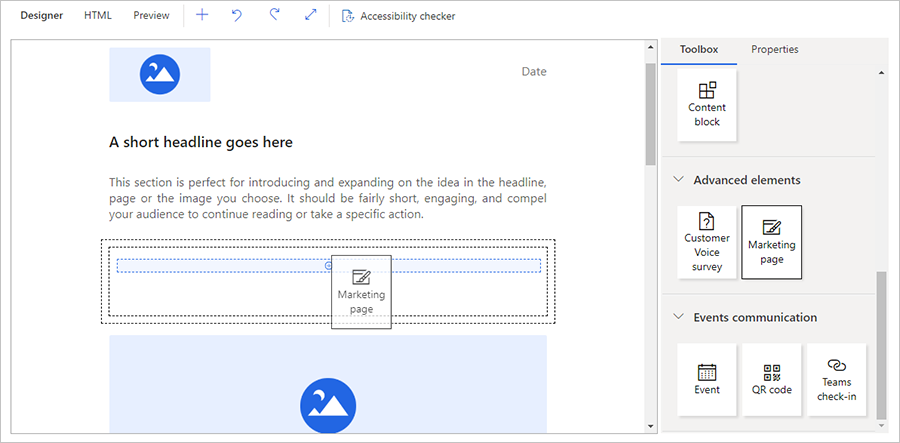
- When you drop the Marketing Page element in place, it is automatically selected and the Properties tab opens to show its settings.
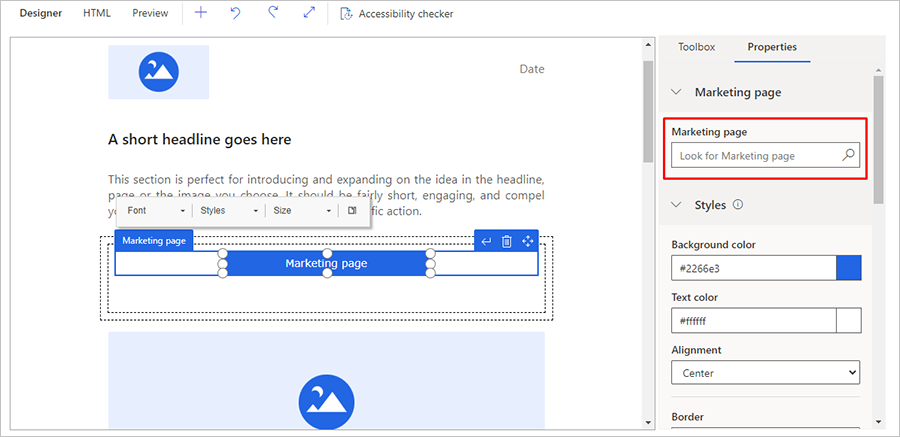
- Continue to style and format your button as follows:
- Edit and style the button text by working directly on the canvas and using the floating toolbar, just as you would with a Text element. You might enter text such as Click here to register for your download.
- Working on the Properties tab, choose a background color, text color, height, and width for the button.
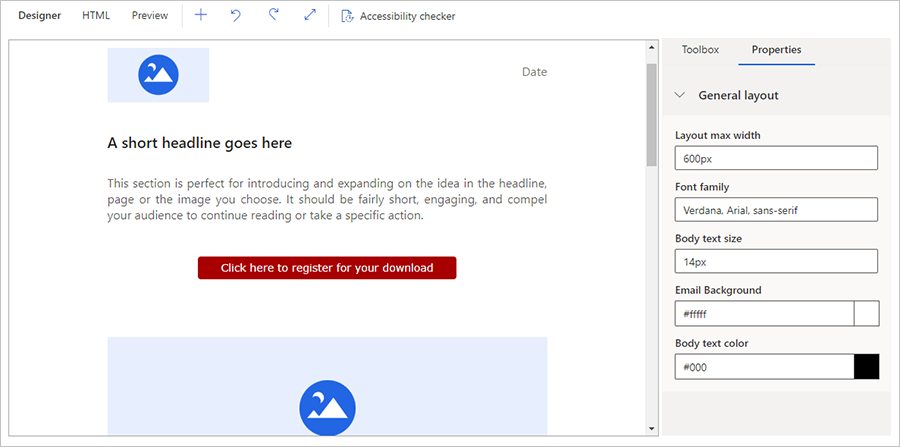
- As before, Save your message, choose Check for Errors, fix any issues, and then Go Live.
- Create two more marketing emails:
- A download link message: This message will be sent after a contact submits the form on the landing page. Set the subject to Thank you for signing up, here's your download link! but don't worry too much about the content for now. (In a real project, you would include a link to the promised download here.)
- A follow-up message: This message will be sent if a contact does not submit the form after a few days. Set the subject to Don't miss out!, but don't worry too much about the content for now. (In a real project, you would repeat most of the original offer here.)
Remember to include all required elements and to go live with each of them.
7. Go to Marketing > Marketing Execution > Customer Journeys and create a new customer journey like the one you made in Create a simple customer journey. As before, add the following:
- Configure an Audience tile in the first position by selecting the Segment you made Create a dynamic segment in Dynamics 365 Marketing as the source of the audience.
- Add an Email tile right after the Audience tile and configure it to reference the first email message you made for this exercise (with the landing page button).
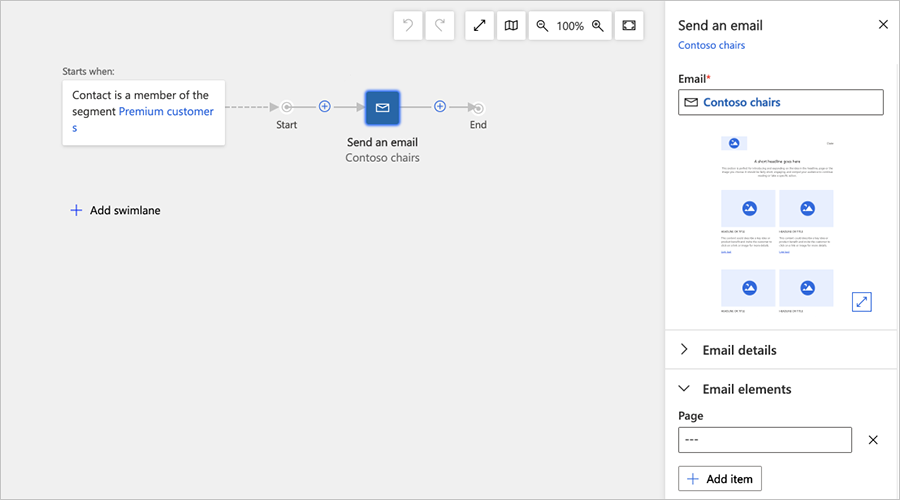
- Although your email message includes a link to a landing page, the journey is not aware of that link, or even of the landing page itself. This journey should react to landing page submissions, so you need to reference the marketing page inside the email tile properties. Go to the Send an email tile Properties and add the correct Page item inside the Email elements category.
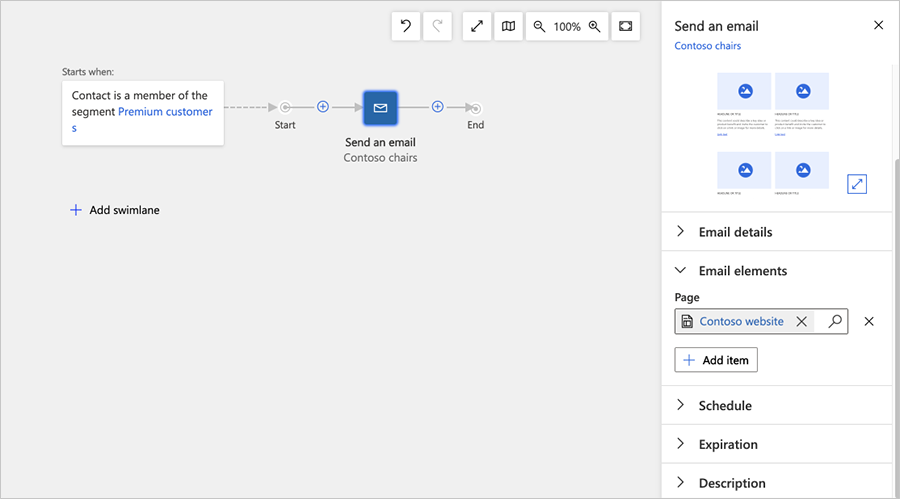
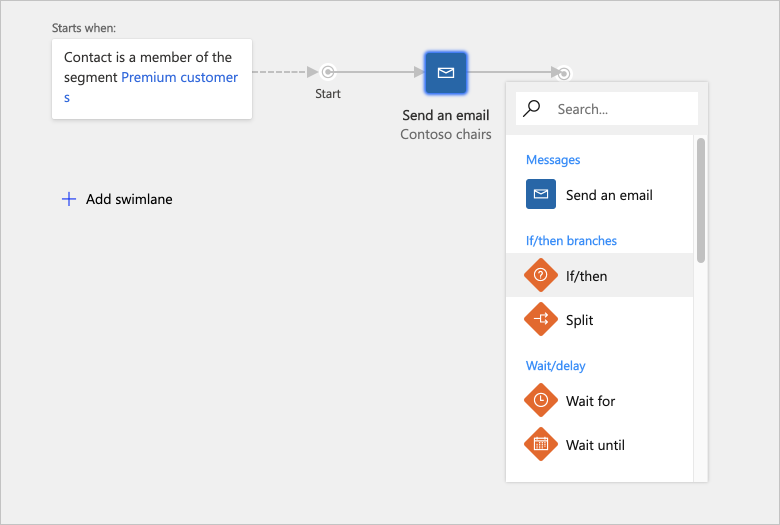
- Now add a condition ("If/then") tile. If/then tiles add interactivity to the journey by splitting the pipeline and establishing logical criteria for deciding which path each contact will take. Select an If/then tile from the in-place menu on the canvas and add it immediately to the right of the Send an email tile.
- The Properties for the If/then tile will automatically appear on the right side of the canvas.
Make the following settings for Condition:
- Source: Choose the name of the Marketing Page tile you added to the Send an email tile properties. This references the name of the marketing page itself.
- Condition: Set to have registration.
- With the If/then tile still selected and the Properties tab still open, set Wait up to to establish how long contacts will wait on this tile before being sent down the false (bottom) path if they don't submit the registration form. Three days is a typical timeout value, but the best choice depends on your circumstances.
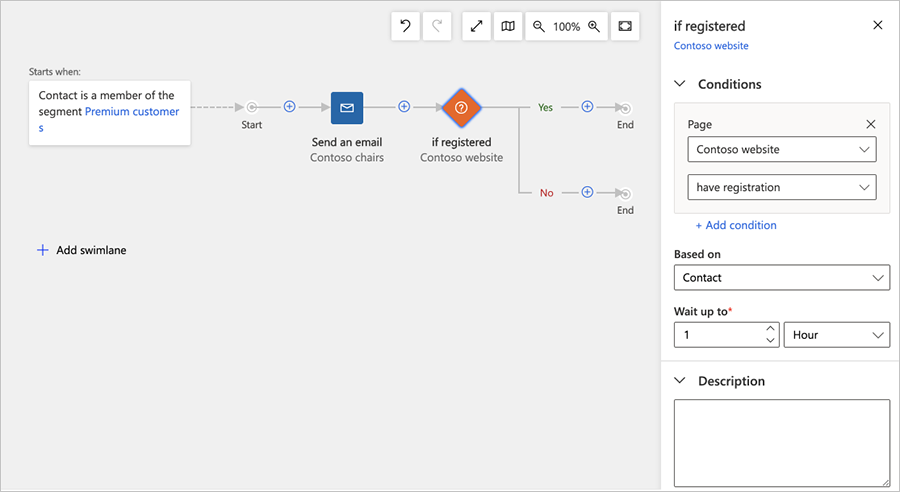
This expression evaluates to true as soon as a contact submits valid information by using the referenced landing page. Each contact will wait at this condition tile either until its logic evaluates to true or until the Wait up to period has elapsed, whichever comes first. As soon as a contact fulfills the requirements, it's sent down the true (top) path; if the Wait up to expires first, the contact is sent down the false (bottom) path instead.
- Add two more Send an email tiles after the if/then tile, one on the top path and one on the bottom path.
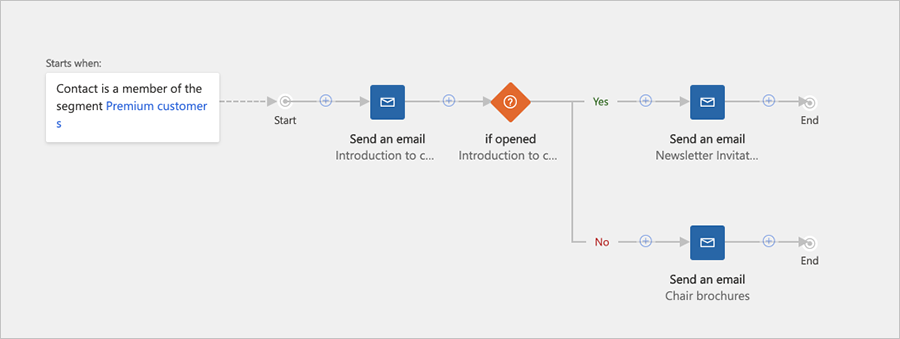
13. Save your customer journey. Then, as you've done before, go to the General tab to give the journey a name and schedule. Finally, Check for Errors and Go Live.
(Source: docs.microsoft)
See more
Create a marketing email and go live
Create a dynamic segment in Dynamics 365 Marketing
Create a simple customer journey
Set up automatic lead generation and scoring
Create a landing page with a form
Recommended content
Microsoft Dynamics 365 training courses


